Are you about to set up Google Shopping Ads and attract more visitors to become your customers directly on the search engine? Are you asking for help from Google but get lost in many instructions tabs and are not sure where you should start?
Take this article as a reference as it will guide you on how to set up Google Shopping Ads seamlessly! Plus, some tips are also generated from Google in this guideline for you to easily keep track of your performance.
Let’s get started!
Premium Guideline to Set Up Google Shopping Ads 2022
1. Get familiar with Shopping Ads and Shopping Campaigns
1.1 What and why should you use it?
When it comes to Google Ads, businesses usually utilize text ads to pay for their website to appear on the top of search engines. However, if you are launching a shop and want to make your products placed in a more visible way, starting to set up Google Shopping Ads and build your Shopping Campaigns are a perfect idea.
There are two types of Shopping Ads for you to promote your store: Product Shopping Ads and Local Inventory Ads. The former ads are generated via the product data on your Merchant Center account – which we will discuss in the “How does it work?” part. The latter is generated by merging product and inventory information.
Knowing how to set up Google Shopping Ads can help potential customers visualize your products while comparing prices between different brands directly on Google. Thus, it will also lead to higher conversions with the right audience that you are looking for.
Moreover, Google Ads uses the product attributes to make ads for you rather than generating keywords, so it will help you manage your retail-centric campaign and see the level of product performance effortlessly.
Not to mention that set up Google Shopping Ads with text ads is a perfect combination for eCommerce business as it allows you to display more than one product on Google.
1.2 How does it work?
First, you need a Merchant Center Account to create a feed with your product data. We will discuss in detail in the next section when guiding you how to set up Google Shopping Ads.
As it’s mentioned earlier, Google will collect data from your Merchant Center products to display ads rather than keywords, so make sure you fill out the information correctly and meet Google’s requirements. Plus, don’t forget to check the Shopping Ads policy and update product data within 30 days to maintain your ads.
2. Set up your Shopping Ads
2.1 Create a Merchant Center account
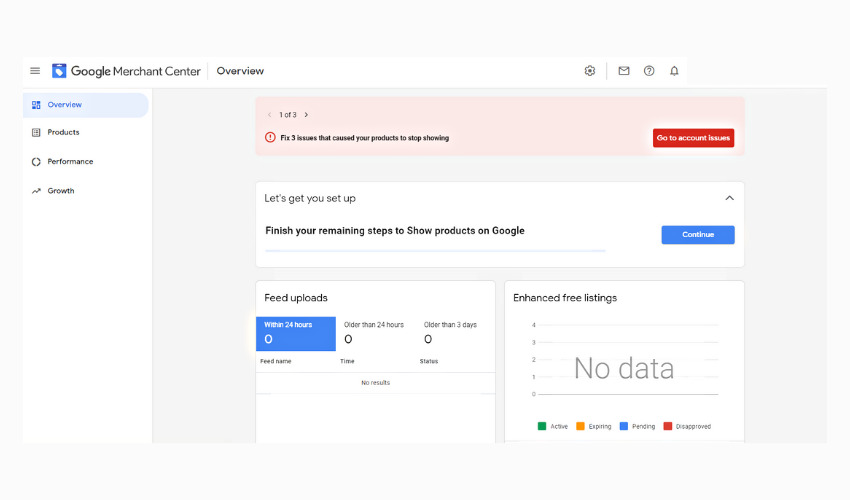
As we already discussed earlier, signing up for a Merchant Center Account is mandatory to set up Google Shopping Ads for your business.
To begin with, tell Google about your business with some basic information. However, you don’t have to spend much time in this step as you can edit at any later time. You should fill in your business name (it can be your website, your store, or brand name, etc.), the location, timezone, and valid phone number.
Remember that the timezone you fill in will decide when your ads appear on the search engine. When you change your timezone, Google will measure and report your performance data differently. If you alter your timezone, the change will not affect data that was added before you made the change.
The next step is to choose where your customer will check out:
- If you choose “On your website”, clicking on the product listings on Google will lead customers to your website to make a purchase.
- Choosing “On Google” will allow customers to pay directly on Google.
- The option “At your local store” will guide customers to visit your store to buy.
2.2 Link Merchant Center Account with Google Ads Account
After that, you can choose to set up Google Shopping Ads by linking with Google Ads. This will enable your product data from Merchant Center to be transferred to Google Ads for use in advertising campaigns.
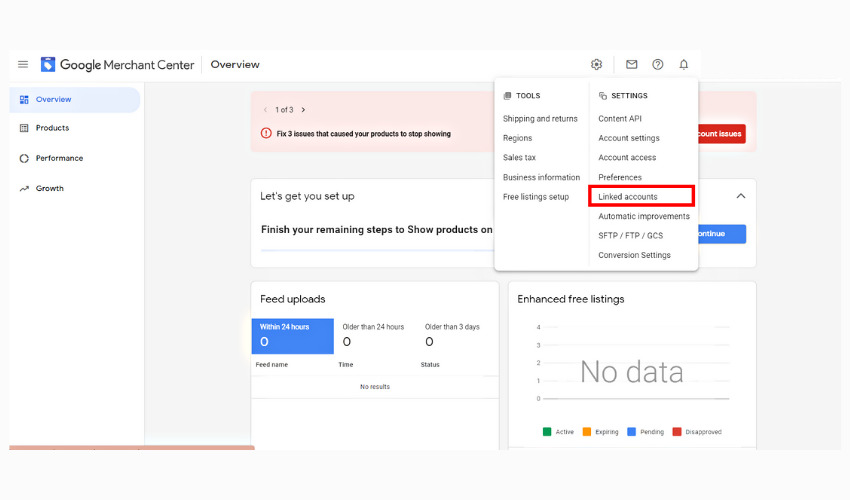
- Select the Gear con on the top right of your dashboard.
- Then click Linked accounts below the Setting.
- Click Google Ads.
- You can choose to link either Your Google Ads Account or Other Google Ads Accounts.
- Click the Link next to the Google Ads Customer ID you want to link.
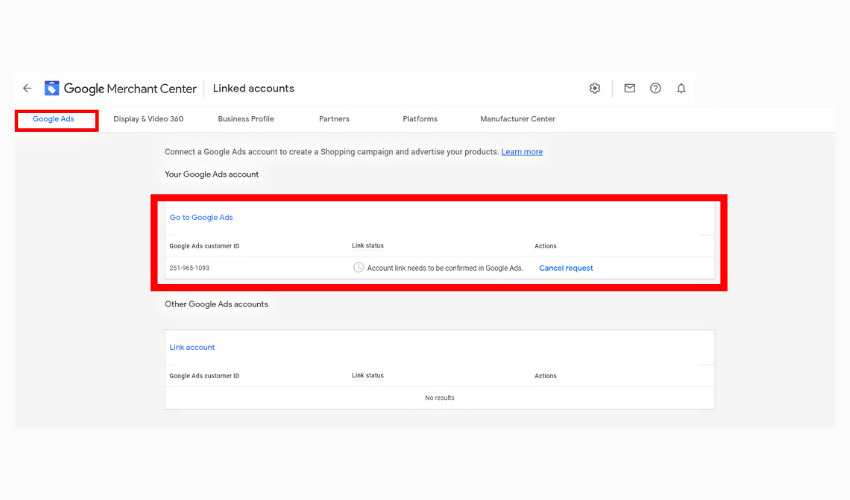
Google also allows you to cancel a link request or unlink accounts if you have another option.
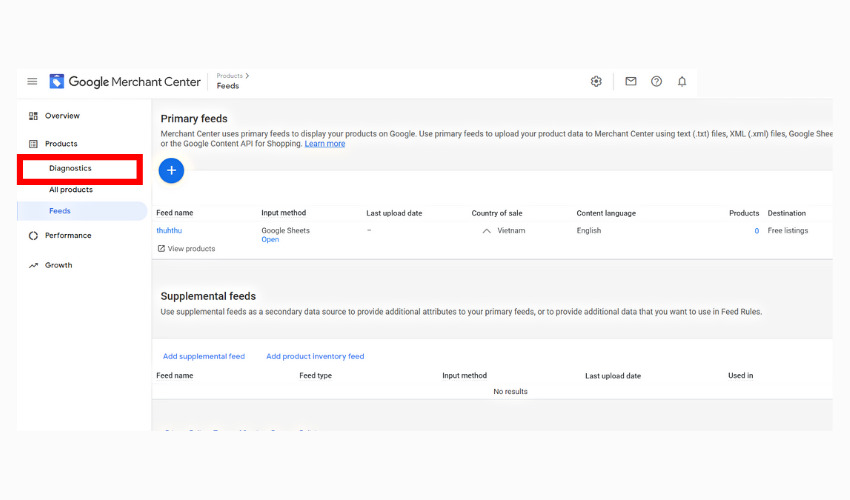
2.3 Add products to your feed
To set up Google Shopping Ads, we need to create a feed where we can submit original data:
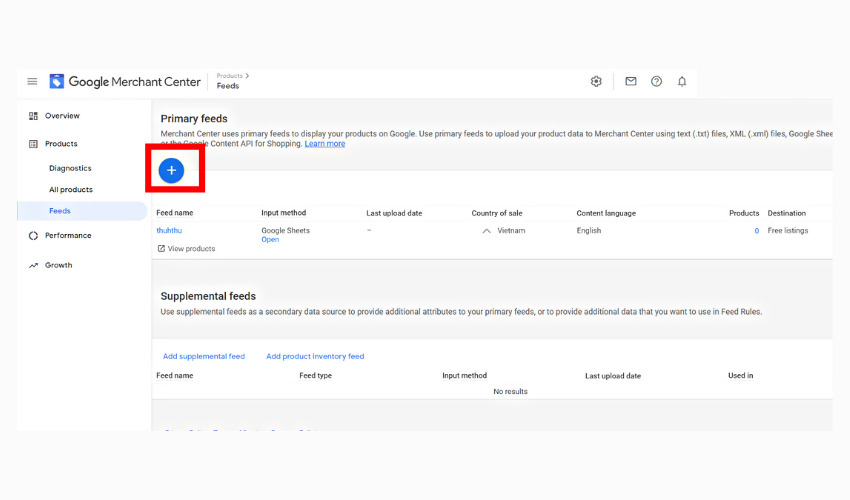
- Click Products on the left-hand side of the Merchant Center.
- Choose Upload multiple products to create a primary feed.
- You will have to fill in Basic Information, Name, and Input Method to set up a feed.
- After filling in all necessary information, there will be a Feed option under Products for you to add a new primary feed.
- Choose the icon (+) if you want to add new primary feeds.
- You can also create a supplemental feed you can augment product data in one or more primary feeds.
- Go to Diagnostics to see how your data is working.
2.4 Set up shipping service
Shipping is also one of the most important factors that lead to the buying decision of your customers. Therefore, make sure your shipping cost is the same between the Merchant Center and your website.
First, you will have to add a shipping service.
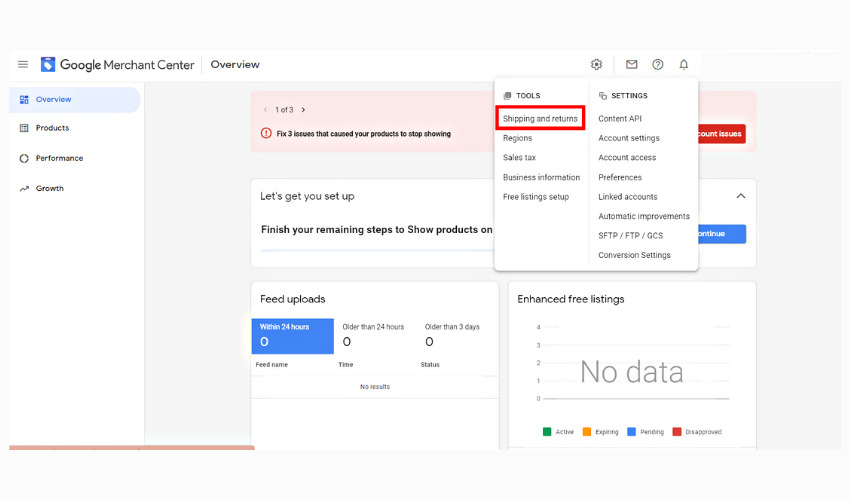
- Click the Gear icon on top of the website
- Choose Tools, then select Shipping and Return under it.
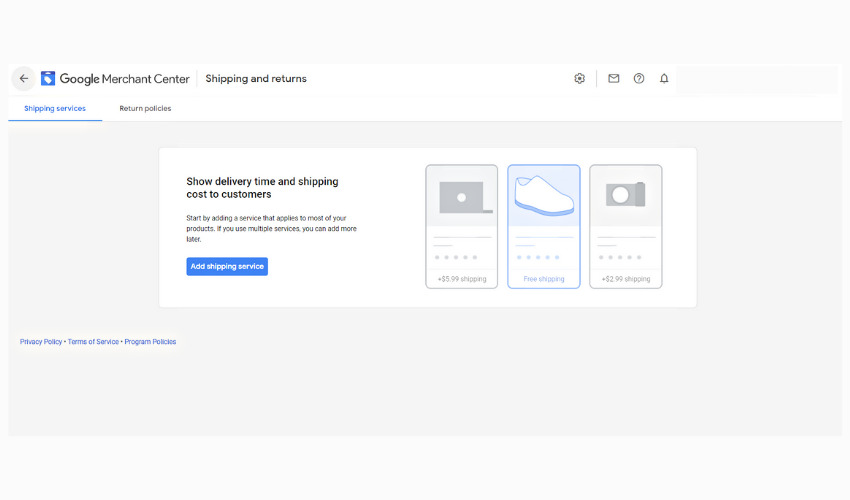
- You will be taken to the Shipping services tab.
- Choose Add shipping service.
- Fill out Service Coverage, Delivery times, and Shipping costs.
For shipping coverage, you have to create a new name to differentiate it from other services. Plus, add countries that you are able to deliver to those places with your shipping service. Make sure everything you fill in matches with what is presented on your Merchant Center feed or else your items will be disapproved.
Next, you will have to set up delivery times in the next section.
- Order cutoff times mean selecting the time of day when orders must be placed to be processed the same day. Then select a timezone.
- Regarding Handling time, fill in the minimum and maximum days to process an order. In the Select days box, you can choose which days are suitable for your orders to be processed.
- For Transit Time, you will have to fill in business days to deliver an order. You can also select which days of the week are possible for an order to arrive at customers’ houses.
Finally, choose the possible shipping costs that customers will have to pay when buying your items. It can be free shipping (or over a certain amount of money) or the cost is depending on the value of the order. Calculate your shipping costs carefully to not only make customers feel comfortable to purchase but also bring profits to your business.
Note: There will also be a Holiday Shipping Cutoff section available in France, the US, and US Holiday.
In the advanced settings, you can also set up Shipping Rate for your service.
2.5 Verify and claim your website
First things first, you will have to add your website address.
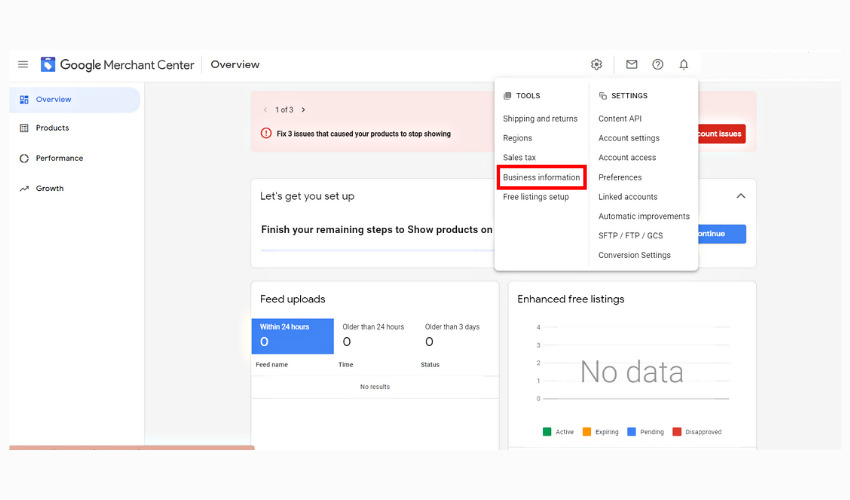
- Click the Gear icon on top of the website
- Choose Tools, then select Business Information under it.
- Click the Website tab.
- Enter your website address starting with http:// or https://.
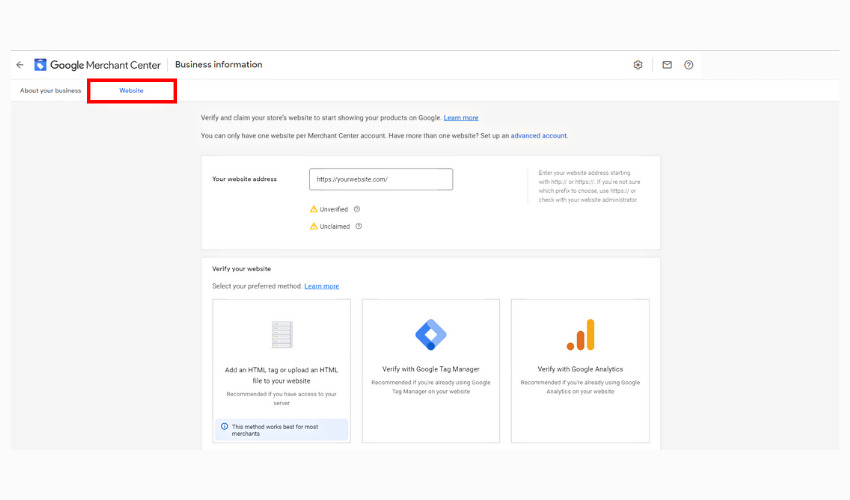
There are four methods for you to verify your website.
- Add an HTML tag (highly recommended)
- Upload an HTML file (highly recommended)
- Utilize Google Tag Manager
- Utilize Google Analytics
Once you click one of those options, you can see a full instruction to help you with verifying. Click Verify Website at the bottom right when you finish choosing your verifying option.
After finishing the verification step, you have to claim your website. At the bottom right, click the Claim website button. Only those who have validated the website are eligible to claim it.
Before moving to the Shopping Campaign step, remember to configure Tax Settings (the US only) and add promotion information if possible.
3. Create your Shopping Campaign
Creating a Shopping Campaign is crucially important to successfully set up your Google Shopping Ads, as it will provide detailed information about what your products are before customers click your ads, thus increasing more sales and generating more new leads.
The first step of creating a campaign is signing up for your Google Ads account – which we already finished in the 2.1 guidelines.
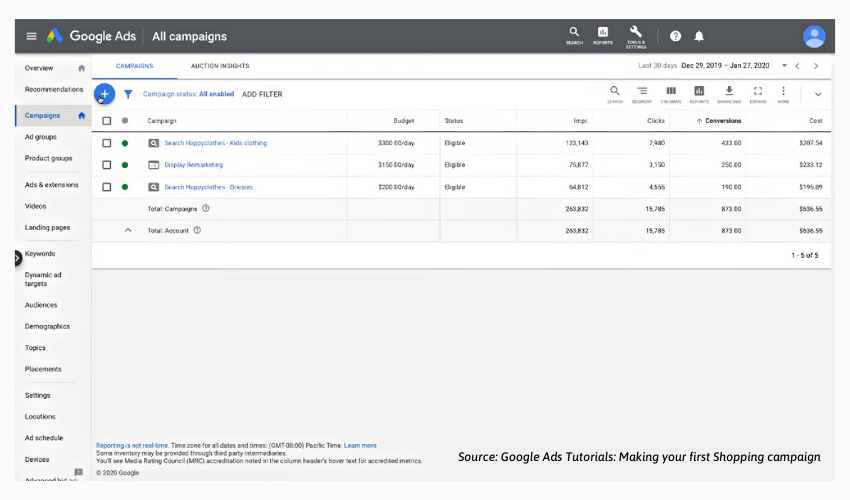
- Select Campaign on the left-hand side.
- Click the icon (+) and select New Campaign.
- Select the Goal that you want to achieve when launching this campaign. For example, you can choose Sales for ads to reach an ideal target audience that is willing to pay for your products.
- In the Campaign Type, select Shopping.
- Select the Merchant Center account that you want to advertise the products. Fill in the country that products will be sold.
- You can choose between Smart Shopping Campaign and Standard Shopping Campaign. Research this one carefully because you won’t have another chance to come back and edit.
Before moving to the next step to set up Google Shopping Ads and Shopping Campaign, let’s have a quick look at the comparison between Smart Campaign and Standard Campaign. It might be useful for you to decide which is the best option for your business:
Smart Shopping Campaign | Standard Shopping Campaign |
Various networks for your ads to appear | Limited to Search Network |
Easy integration with third parties | N/A |
Automatic bidding | Manual bidding, helping you to fully control your bidding. |
| Optimizing campaigns with remarketing lists, track conversions, and so much more. | Manage everything with your own decisions. |
To conclude, if you are more into an automatic campaign where Google decides most of the tasks for you, the Smart campaign is the better choice. However, if you are newbies and want to discover how to manage your campaigns by yourself, Standard Shopping Campaign won’t let you down with its self-management.
Continue with creating a campaign, you will have to fill in some information about your campaign in the Select Campaign Settings, including:
- Campaign name
- Budget
- Bidding (If you have a particular goal, check the box to set a target return on ad spend)
Moving Product Groups and Assets, select specific products or groups of products to set up Google Shopping Ads in your campaign. Products used in your campaign should have at least 100 conversions in the last 30 days to receive the best outcome.
What’s next is to upload the assets – your business logo, product image, text, etc. to create remarketing ads for Google Display and Youtube (if you choose Smart Shopping Campaign).
Click Save to finish your first campaign.
4. Tips to make your Shopping Ads attract the right audience
First things first, make sure that your ads meet Shopping Policy’s requirements. To check whether your products comply with the policy or not:
- Go to your Merchant Center Account.
- On the left-hand side menu, choose Products, and then select Diagnostics.
- Check and fix whether your items, feed, or account have any issues.
Your ads cannot be shown to the audience mostly because of account issues. According to Google experts, there are five common account issues that your business ignores or hasn’t figured out. These are:
- Visitors cannot access your landing pages from a different location.
- The information displayed in the ad doesn’t match with what is shown on your website (e.g.: product price, tax, shipping costs, etc.)
- Forget to include Contact Information and Terms & Conditions on your website.
- Forget to include Return & Refund policy in your landing pages. Even if your store doesn’t have this policy, you still have to state it clearly on your site.
- Types of products, such as Subscription or Service, aren’t suitable to be displayed on Google Shopping Ads. Only physical items are possible.
Besides account issues, there are also some common item issues that you need to pay attention to.
For example, Image Overlay Violation is one of them. In order to fix this problem, remove the discount tag or watermark on your image, then submit the image once again. You will have 7 to 28 days to fix those issues, or else your items will be disapproved, and what’s worse is receiving account suspension from Google.
Re-analyzing your product feed as well as your campaign is also a good idea to make your ad more visible to your audience.
Wrapping up!
Phew…! We have just been through the very basic step to set up Google Shopping Ads. The next step is to update your product data and launch your campaign wisely and profitably.
We hope that your business has gained a lot of useful information from this article, and don’t forget to share the results with us!
Read more
)